Tuesday, July 13, 2010
my craft room


this was my christmas present from my husband and my father in law!
after months of hearing me "ohhh" and "ahh" over pictures of craft rooms in magazines, i came home one night from work to a freshly painted room (GREAT colors, huh!?). christmas morning he had moved all of the homemade boxes and that awesome desk into the den. isn't he just the best?!
the boxes have so many uses! he made me paper sorters, drawers, shelves, and open spaces for my big stuff. he built the boxes to fit into the space and leave the window unobstructed for light.
my mr & his poppa: THANK YOU!!
crazy about picture frames


centralia college (local communiyt college here) had a spring craft show in which i had a booth. my first craft fair to be at as a vendor!! i brought about 55 frames and who knows how many cards... but this is about the frames!
i picked up these little guys at michaels for $1 each, unfinished wood frames that came in oval, square, rectangle, and heart.
i covered them in sheet music, patterned paper, cardstock, old wall paper, handmade paper, painted them... they were stamped on, ink distressed, sandpaper distressed, and modge podged.
i embellished them with hat pins, buttons, sequins, and flowers (homemade, fabric, die cut, silk).
more wedding accessories

these lovely things i made as table decor for our wedding. wanted something tall to offset the little glassware.
i bought two diffrent bases, both inexpensive terra cotta from home depot. used pots and saucers, covered holes in bottom with scotch tape before filling with quick dry cement (simple to use, never used before but was very easy to work with). i got diffrent kinds of twigs and branches from michaels and the backyard (another good reason to live in the middle of nowhere!) and shoved them into the cement as it was drying. once dry, i spray painted base of twigs, top of cement, and base itself with primer then with a chocolate/woodsy spray paint.
the birds i made out of ivory cardstock. each bird is two pieces (body & wings). before connecting peices, i ran the paper through my cuttlebug and enbossed with french script to give texture. once embossed, used scrapbook tape adhesive to connect wings to body, poked hole in through where the two were connected, and used fishing wire to sting up on the twigs.
once the cement was dry, i used hot glue on top of cement around base of twigs and stuck moss to base for the "natural" feel.
of all the things i made for our wedding, i think these were my favorite!
Monday, July 12, 2010
more wedding accessories


we shopped around for months before the wedding collecting odd vases, bottles, tea cups and saucers, candlesticks, and anything else that caught our eyes. we wanted blue, brown, and creamy things. items to hold vintage buttons, floating flowers, short and tall candles, sticks, feathers, flowers, beads...
we found some great wooden candlesticks that i spray painted chocolate and we used with tall teal tapers. we found some awesome old clorox bottles (brown glass) that looked impressive with a single blue hydrengea in them. got some short old copper candlesticks i spray painted cream then sanded for a vintage/distressed look. we turned them upside down and placed the tea cup saucers on top to use as a holder for the buttons and things.
i was very happy with what we collected and am still not sure which i enjoyed more, the collecting or using!
wedding accessories


i bought this creamy pillow at michaels and wrapped it with sheer wired chocolate ribbon coupled with a thin chocolate. the teal around the middle is actually left over material from my dress. turned out just gorgeous, matching our colors pefectly!
i made all the bouquets, mine and the two bridesmaids (my daughters walked with me). got all flowers from michaels craft store and paired magnolias, hydrangea's, roses (large open), and peonies with feathers and twigs. covered the stems with a creamy satin ribbon and covered that with the same sheet chocolate as in the pillow.
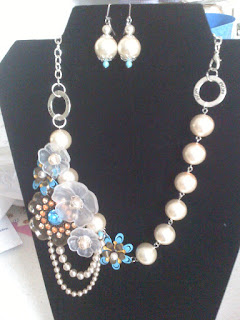
wedding day bling
Friday, July 2, 2010
COMING SOON!
this blog is currently under construction. until finished, please feel free to visit my current blog
Subscribe to:
Comments (Atom)


